Showing posts with label Sewing and Crafts. Show all posts

Saturday, January 27, 2018

What Would Jane Think?

It was about 1865 when Euphemia  "Jane" Carter Freeman learned to make lace as a child in England.   When she was about 45 years old, she left England behind forever when the family emigrated to northern Utah.  Though the Freemans were city folks, in Utah they took up the farming life and lace making was left behind in England.  Now, that lace making legacy exists in the family again!

                                               Euphemia Jane Carter Freeman


Many years later, Jane's grandson, Kay Freeman, retired and took up the hobby of woodworking.  During a visit to a niece in Alaska, he noticed all the beautiful birch trees and coveted them.  Kay's niece (and Jane's great-granddaughter) lived in rural Alaska.  Kay choose a birch tree from their yard and they mailed him the tree trunk.  He used it for several special projects, but saved enough to make a beautiful picture frame for his niece.


                           Roma with her brother, Kay.  Roma is the mother of Kay's niece.


Years later, Jane's great-granddaughter found a teacher to show her how lace was made.  After some years of practice, she made a piece of sampler lace.  It took her a long time to make it, and there are many mistakes in it, but it was finally finished.  After all that time and effort, she wanted to make sure the precious piece of lace was kept safe, so she put it in the frame Kay made.


                                                  Finished and framed lace sampler


                              Pattern (called a pricking) and pins used to make the lace sampler


Now it is framed in the beautiful birch frame.  I wonder what Jane would think of it?


Thursday, May 14, 2015

Use It Up, Wear It Out, Make It Do, Or Do Without - Quilts from Recycled Jeans

In making room for things in a closet at Mom's, we came across a huge stack of old jeans.  When I asked why they were there, I was told my sister was saving them to make quilts out of.  It seemed to me that stack had been there a LONG time.  One of the pairs of jeans was little boys size 6 and I'm pretty sure my nephew is 21 years old now and quite a bit bigger than size 6.

In any case, since Mom was planning to come up and stay for a couple of weeks I invited her to bring along those old jeans and make them into quilts at last.  She seemed agreeable, so in the time before she came to visit she cut the seams out of the jeans and removed the pockets.  At one time she had made a jeans quilt and left the pockets on.  It looked cute with the pockets, but apparently a trip to the beach filled those pockets up with sand, so we decided it was best to remove all pockets.

When I went to pick her up to bring her to our house, she had a laundry basket full of denim strips from the jeans and a variety of backings and batting.  I started right in sewing the strips together into longer strips and then used my rotary cutter to make them straight.


We made a variety of sizes, depending on the size of the backing we had.  Once I had enough strips sewn together we put it on the quilt frames where I left Mom to tie it while I went and sewed more strips together.


Mom was hoping we might get two...and maybe three done during her visit, but with the two of us working together, we ended up with seven quilts of various sizes!


Tuesday, August 12, 2014

Grandma Wore an Apron


    Grandma wore an apron, though if you tried to prove it by looking for a picture of her wearing her apron, you would never believe it. It was clear the apron was used to keep her clothing clean and was certainly NOT meant to show up in something as important as a picture! 
    It wasn’t until I was older that I wondered why aprons were so important. They have even crept into idioms like 'tied to his mother’s apron strings', or 'cut the apron strings'.
    Grandma had a lot of aprons and made even more of them for various occasions.  Frilly little half aprons were meant for girls serving at wedding receptions.  Bib aprons and full aprons were for cooking, canning and washing. When I spent my twelfth summer with her, she helped me sew cobbler aprons for my little sisters.  When I was older, she helped me make full aprons for me and my sisters.
    At some point, she went through a phase of decorating gingham aprons with chicken scratch embroidery.  Her embroidery patterns were little scraps of gingham with the various motifs on them.  It took careful math to make sure the pattern came out even on the apron.
    I don’t know when aprons went out of vogue, but I grew up donning old clothes
for dirty tasks rather than wearing an apron.  The mint green and white checked drawstring apron I made in 7th grade home ec class is still as pristine as the day I made it. Maybe it was the washing machine that caused their demise by making laundry so much easier that we began to think nothing of putting on fresh clothing every day or so rather than making them last a week.
   When I started working at the living history farm, I fell in love with aprons.  I never realized what handy things they were!  When little girls showed up to help in the kitchen, they had to wash their hands.  Then they bemoaned the fact they had no towel to dry their hands.  Silly girls!  What did they think an apron was for! 
   In the garden our beans were planted on tall tripods.  With the ends of my apron skirt tied together, I could use both hands to pick the beans, using my apron as the bucket which moved right along with me as I picked.  They worked for bringing in produce from the garden and eggs from the chicken house.  When baby chicks or ducklings needed transport to another location, the apron was ready.
   Aprons were also handy for tear wiping, nose wiping, face washing.  By bringing one end of the apron around back and over the shoulder to tie to the other corner of the apron, it made a dandy  baby carrier as well.
   Do you need to shoo away a fly or herd the animals somewhere?  Simply flap that apron at them and watch them go.  Are you trying to get the attention of someone in the distance?  Wave that apron like a flag.
    You can also use an apron to socialize kittens by carrying them in the bib like a kangaroo.


    Aprons have changed over the years.  In the mid-1800s  women wore pinnies or pinners which were long half aprons with a bib, held up not by straps, but by straight pins.  They did not usually have pockets attached to the aprons then, but often wore a separate ‘pocket’ tied around the waist and hidden under the apron. By the early 1900s, aprons had straps to hold them up and frequently had large pockets.  By the 1950s aprons had become more frilly and decorative rather than useful.

Friday, June 20, 2014

Bobbin Lace progress


Gradually I am understanding a little more about bobbin lace and how it works although I've still a LOOOONG ways to go.

The trick, of course, is translating a pattern that looks like this:


Into something that looks like this, mostly with no instructions other than a picture to work from, or at best 3-4 lines with very general suggestions on how to get the  job done.


Not entirely true on this one though as it came lavishly illustrated on about 5 pages. 


My goal is to be able someday to do a pattern called Running River which my great-grandmother, Euphemia Jane Carter Freeman remembers learning to make as a lace maker in England.


Monday, December 30, 2013

Christmas Ornaments With Stories


Every year we seem to acquire new ornaments for  our Christmas tree.  This year I made them myself.  I took a round piece of plastic mesh about 3 inches in diameter.  Then I cut out 4 pictures the same size as the mesh and laminated them.  I placed them on the mesh and then used a needle to poke holes all around the edges of the mesh.  Then I used yarn to fasten the edges together and to hold the pictures in place.  It would be easy to use any sort of picture to make similar ornaments.  In this case, the color side of the ornament has pictures of the woodworkers parents and my parents.


The reverse side of the picture, the black and white side, has the same couples on their wedding days.  They were married almost 2 months apart back in 1946.  I rather liked seeing them on the tree.


The other ornament with a story is really not new.  I am sure one of  our kids made the star many years ago.  It was made from a piece of poster board, cut in the shape of a star, then covered on both sides with festive carousel pony wrapping paper.  Over the years it has been a stalwart ornament for the bottom of the tree while the more breakable ornaments hang higher, out of the reach of small children.  This year we had 7 grandchildren here to help in decorating the tree, so I handed the breakable things to the older children and gave the more sturdy things to the younger children.  Over the years we have had 3 different angels residing on the top of our tree.  The angel always goes on last.

The youngest child this year turned 2 in September and was thrilled to help decorate a Christmas tree.  At home she apparently has a storybook which shows a picture of a baby being held up by its father to place a star on top of the tree. When I handed her the wrapping paper star and told her to put it on the bottom of the tree she resisted strongly and pointed up at the top of the tree and let us know quite emphatically that she knew very well where that star belonged.  After all, she'd seen it in her book!  We called her dad into the room and he lifted her up so she could place that star right where she wanted it.  I kind of liked it there.  Maybe we'll put it there again next year.


Friday, August 9, 2013

IOLI - Lace Making Convention


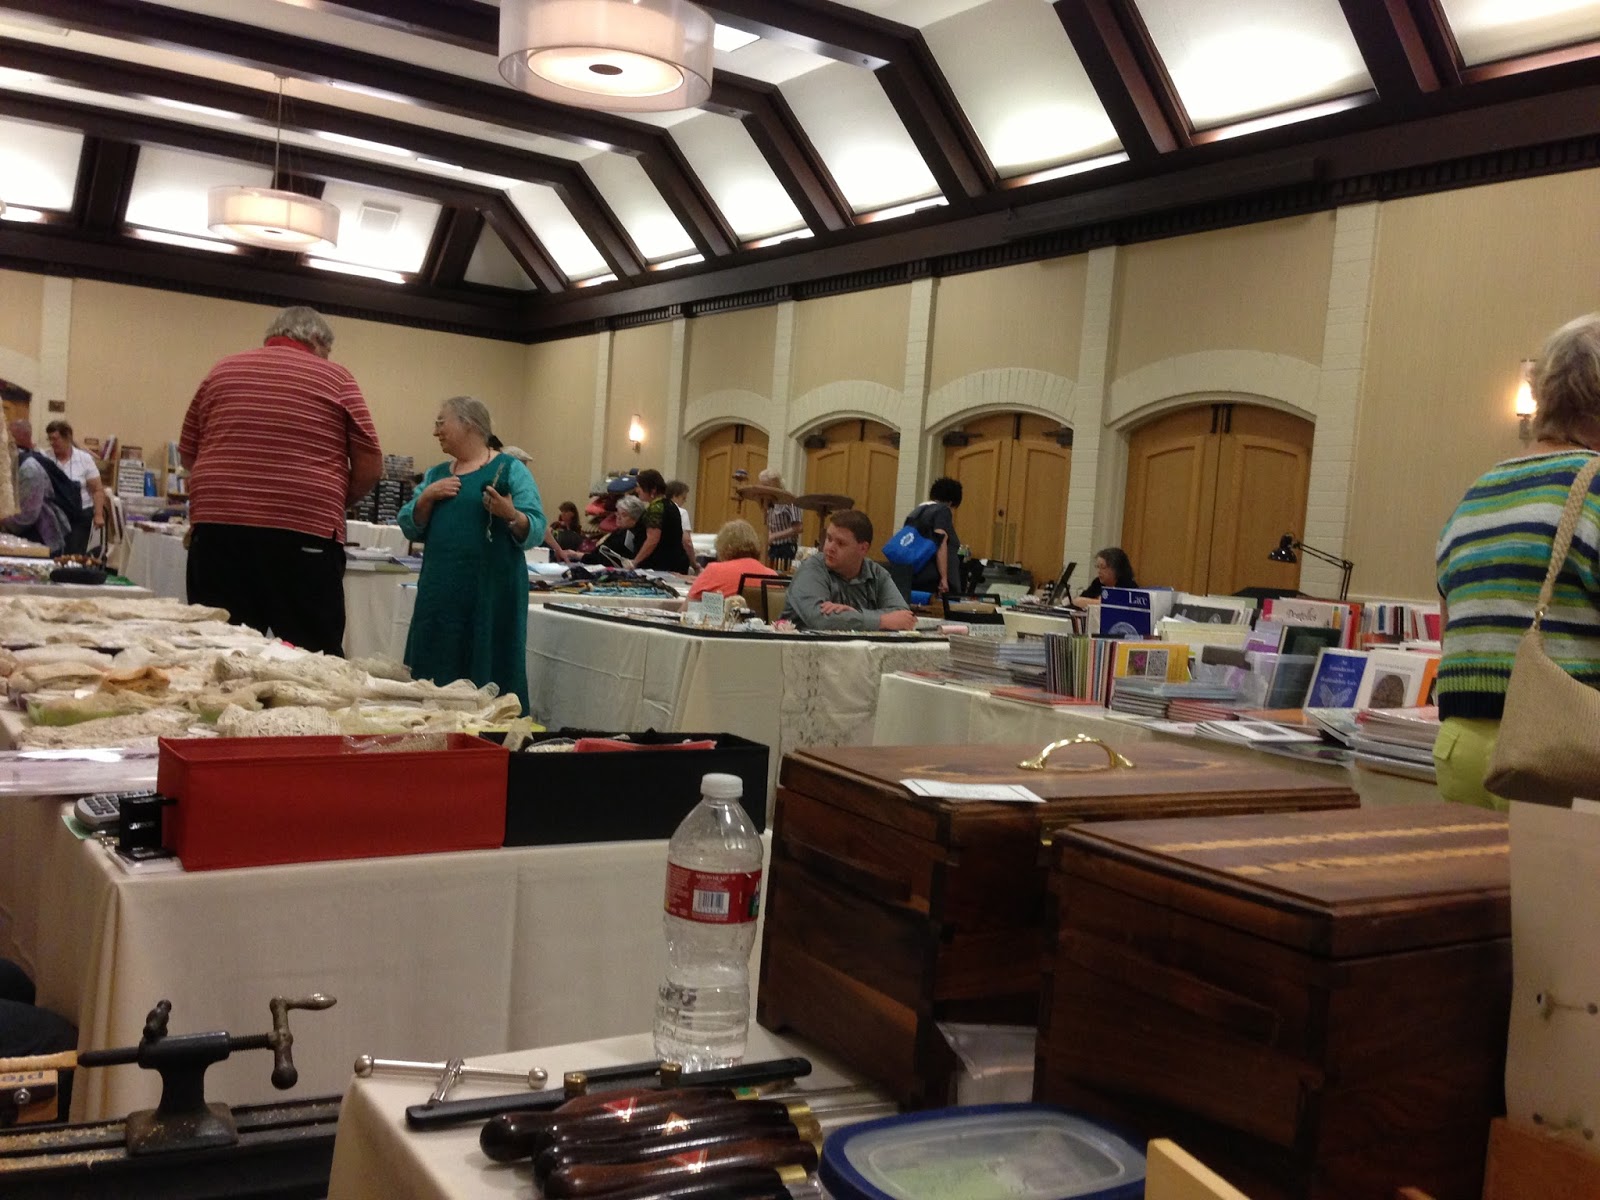
 This week was the annual convention of the International Organization of Lace, Inc...or IOLI.  It was a big deal because it was held nearby in Salt Lake City this year.  Different local lace groups take turns hosting the convention each year.  It was held at the Sheraton.


 I had no idea there were so many different ways to make lace...and IOLI includes all of them!


During certain hours, vendors were allowed to sell their merchandise which included  lace books, thread, bobbins, tatting shuttles, boxes, and every possible device with anything to do with making lace.


During free hours such as lunch time, people could be seen all over the Sheraton, working on their projects.


These samples were some done by the lady in the picture below this one.  She had the most delightful accent.  She lives in Scotland but was born in London.  There were people from all over the United States there, and a few from other countries.  As it turns out this lady was teaching one of the classes later that afternoon.


Here is a peek through the doorway of a class on painting bobbins.


Upstairs was a display room which had every imaginable type of lace in it as well as some embroidery.  Many of the displays didn't allow photographs, but here is an example of some lace where photos were allowed.  This type of lace is called netting.


It was a rather unique experience.

Tuesday, January 1, 2013

Rag Dolls

My grandmother, Ruby, was a talented seamstress.  She was one of the older children in her large family so there was plenty of work for everyone.  Ruby's older sister was tasked with helping to mind the younger children.  Her older half-sister had the job of scrubbing the floor as she was blind and that was a chore she could do.  From about the age of 10, Ruby was the one who made clothing for the family, beginning with underwear and pajamas

 I don't recall ever seeing any patterns in her house, so I asked my mother if Grandma ever used them.  To the best of her memory, Grandma never would buy a store pattern.  After all, they cost 25¢ which was deemed to be a complete waste of money.  When Mom was in school she was required to sew a pair of pajamas for which she needed a pattern so Grandma helped her make her own.  Once when they were shopping in Salt Lake City, Grandma saw a dress she liked, so she stopped and found a pencil and piece of paper in her purse and sketched the dress so she could go home and sew herself one like it.  As a little girl many of my dresses were sewed by my grandmother from patterns she designed and made herself.

When I was about a year old, Grandma made me two rag dolls complete with little dresses and bonnets.  I named them Annie and Bonnie.  They have long since worn out and live only in my memory.  Recently I found a little green box and wondered what could be inside.  When I opened it I realized immediately that they were some of the patterns and tools that Grandma had used to make my rag dolls.  My goal became to see if I could figure out how to use her things to create dolls of my own.

It took me a while to think through the process.  I did make some changes along the way.  The original dolls had hair and faces painted on using stencils.  The box contained a variety of faces.

I didn't have appropriate paints, so I just embroidered a simple face on the new dolls.  The stencil at the upper right was meant to use for the hair, but the dolls I ended up with had oddly shaped heads, so I decided the new dolls would have yarn hair.

When I looked at the various pattern pieces, I realized they were a mixture of different sizes so I had to make some adjustments there to make them fit.


 There was even a pattern for the doll's body in the box.

While my new dolls don't look just like the originals, I'm happy with the final result and for the experience of following in Grandma's footsteps.


Tuesday, August 28, 2012

REAL Bobbin Lace

Today I spent some time volunteering at the local DUP (Daughters of the Utah Pioneers) Museum.  It was a great chance to check out the exhibits for myself.   There in the midst of one of the displays was an old lace pillow and bobbins used by a Swedish emigrant to our area.  She clearly used a finer thread than I have used thus far, but it was helpful to me to see how her pillow worked.

 I was surprised at how little padding this pillow had.  The roller makes it easy to to create longer lengths of lace.

Here you see a picture of the lacemaker herself along with some of her bobbins as well as a piece of lace that she made.

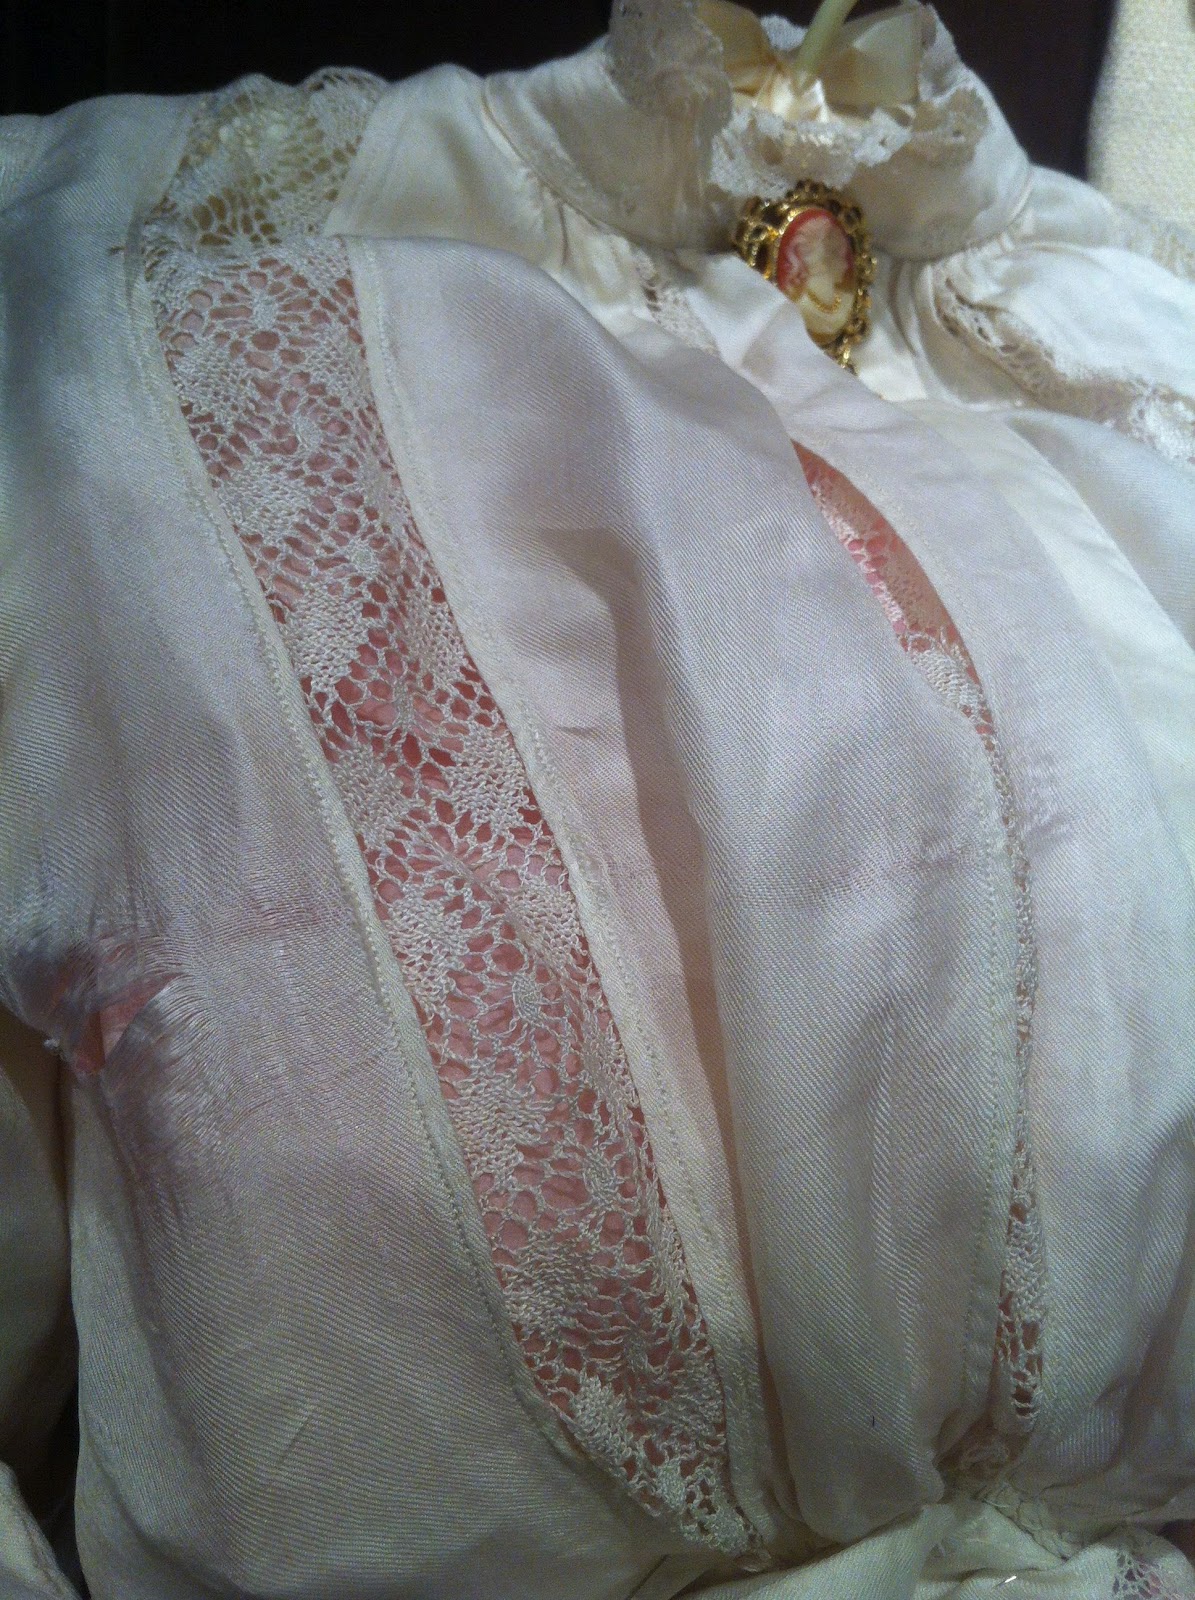
The next picture has nothing to do with the Swedish lacemaker, but it is a lovely bit of insertion lace on a blouse.

In addition to the bobbin lace exhibit, the museum had old furniture, clothing, musical instruments, tools and various other items from the pioneer era.

One visitor, upon coming to the musical exhibit, saw a picture of an old band and exclaimed, "Look!  That man on the end is my great-grandfather!"  That made my volunteer time all worthwhile.

Saturday, August 18, 2012

Bobbin Lace Again

This week's bobbin lace lesson put my brain on overload I think.  I did okay when the projects we were doing were all basically one stitch per project.  This week's project, a torchon fan lace, used 3 different stitches with bottom, middle and top being totally different from one another.

There are quite a few mistakes in this lace sample, but by the last two fan parts I finally thought I sort of knew what I was doing.  The picture shows the pattern used to make the lace which is just above it.  Now I want to find time to make this same pattern a couple more times to cement it into my brain. 

Friday, July 27, 2012

More Bobbin Lace

Slowly I've been making progress on learning a bit about bobbin lace.  As you see, I now have a plentiful supply of beautiful bobbins.  I still have a few to add spangles to, but I have enough done to work on most of the beginner projects now.  Spangles are mostly beads that are added to give some weight to the bobbins as well as keep them from rolling around on the pillow.  In the first picture you see that the bobbins all have thread wound on them and are attached to the pattern. 

 In the next picture it is easier to see the pattern because the bobbins are out of the way.  I poke a little hole in each dot to make it easier to find the right spot when I am working.  The first couple of lines are finished.
 Now the pattern is beginning to be visible.  I can take out some of the first pins I use and move them down to the area where I am working and the lace will still stay in place.

 Now the pattern is complete.  It just needs to be finished.
 Once all the threads are worked to the center you can use some of the outer threads to tie it all off.
 Here is the completed bookmark.